
Last Updated: August 29, 2026
A cleanroom contamination control checklist for audit serves as your operational roadmap during regulatory inspection. Before auditors arrive, you’ll need documentation systems in place, trained personnel, calibrated monitoring equipment, and a clear understanding of your facility’s design specifications.
Start by gathering your baseline documentation: cleanroom classification certificates, HEPA filter test reports, pressure differential logs, and environmental monitoring records from at least the past 12 months. Your audit preparation depends on having these materials organized and readily accessible.
Next, inventory your monitoring equipment. Particle counters, airflow meters, pressure gauges, and microbial sampling devices should all be calibrated within their required intervals. Equipment that’s out of calibration is an immediate audit finding. Applied Physics’s Cleanroom Monitoring System (CRMS) integrates continuous particle monitoring with automated documentation, which eliminates the manual logging that creates gaps in your contamination control strategy during inspections.
Assign audit responsibilities clearly. Designate one person as the audit coordinator who knows every procedure, every record location, and every personnel training file. This individual should conduct a pre-audit walkthrough at least one week before the inspection, noting any visible issues: unsealed penetrations, damaged HEPA seals, or areas where gowning procedures aren’t being followed consistently.
Personnel represent your largest contamination risk. Improper gowning introduces viable and non-viable particles directly into the controlled environment. Your contamination control checklist must verify that every individual entering the cleanroom follows standardized gowning procedures without exception.
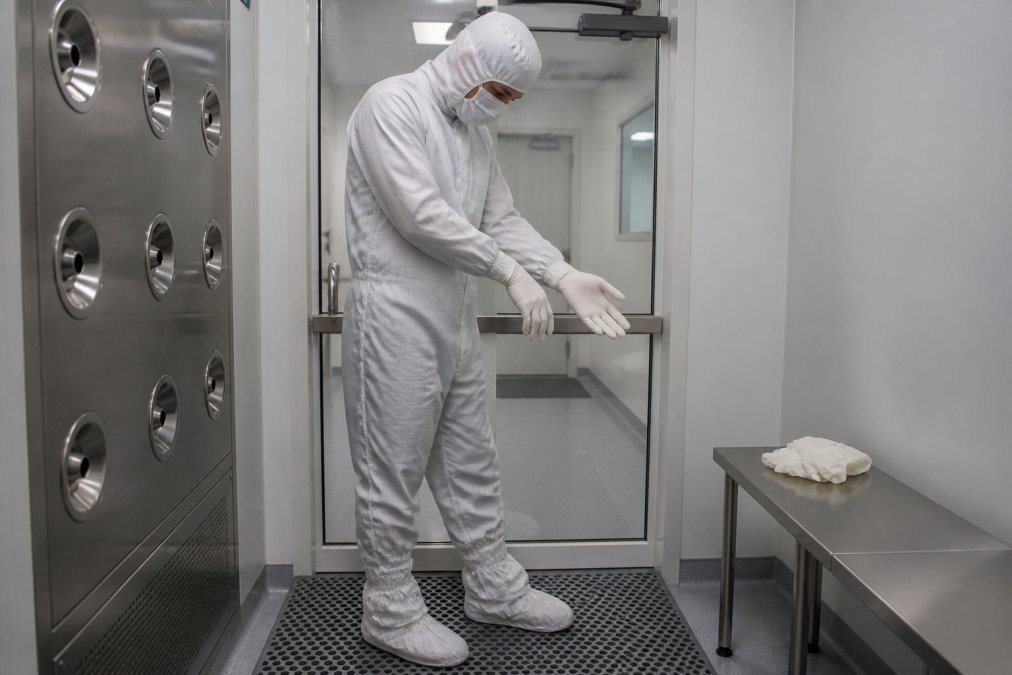
Cleanroom technician in full gowning procedure wearing sterile white suit, hood, gloves, and booties while performing step-by-step entry into controlled environment with proper hand positioning
Start by reviewing your written gowning standard operating procedure. It should specify the exact sequence: hand hygiene, sterile undergarment donning (if required), outer suit, hood, gloves, and booties. The procedure must address critical details like glove overlap, seal integrity, and the proper technique for removing gowning materials without contamination. Auditors will ask to observe the procedure, have at least three personnel demonstrate it during the pre-audit period.
Verify that personnel training documentation exists for every individual with cleanroom access. Training records should include the date of initial instruction, competency assessment results, and refresher training intervals. Document that personnel understand the “why” behind each step, not just the mechanics. Someone who grasps that a loose glove seal allows skin cells and bacteria to migrate into the environment will maintain discipline better than someone following rote steps.
Check that your facility maintains an active list of authorized cleanroom personnel. This list should be current within 30 days and should include role, training completion date, and any restrictions (e.g., “glove-box only” for new staff). Auditors cross-reference this list with actual access logs to catch unauthorized entries or lapsed training.
Inspect the physical gowning area. Is it separated from the general facility? Does it have adequate benches, hooks, and waste containers? Are gowning materials stored properly to prevent contamination? A gowning room that’s cluttered or poorly organized signals to auditors that your contamination control strategy lacks rigor in foundational areas.
Airflow patterns determine how contamination moves through your cleanroom. Unidirectional downflow (laminar flow) or cross-flow systems must maintain consistent velocity and direction. Pressure differentials prevent contaminants from infiltrating from adjacent, less-controlled spaces.
Your contamination control checklist must include documented airflow velocity testing. For ISO Class 5 (Class 100) environments, downflow velocity should typically be 0.3-0.5 meters per second (iso.org). Cross-flow systems require 0.25-0.5 meters per second. Measure at multiple points across the cleanroom floor, at least one measurement per 100 square feet of floor area. Document the date, location, velocity reading, and operator name for each measurement.
Pressure differential monitoring is continuous, not periodic. Your facility should have differential pressure gauges installed between the cleanroom and adjacent spaces. These gauges must be calibrated annually and should be checked daily as part of your operational routine. During audit preparation, pull 30 days of differential pressure logs and verify that readings fall within specification. Negative readings (showing infiltration from less-controlled areas) are serious findings.
Applied Physics’s aerosol photometer technology enables real-time airflow visualization during testing. This approach reveals dead zones and turbulence patterns that standard velocity testing might miss. Auditors increasingly expect to see evidence of airflow mapping, not just point measurements.
Document your fan filter unit (FFU) maintenance schedule. FFUs should be inspected for vibration, noise changes, and filter integrity on a defined interval, typically monthly for critical operations. Any FFU replacement must be followed by airflow re-certification before the unit returns to service. Maintain records showing the service date, technician name, and post-service airflow confirmation.
Test backup systems. If your cleanroom relies on redundant HVAC or FFU capacity, verify that switchover maintains pressure and airflow within specification. Auditors will ask whether you’ve validated this scenario.
HEPA filtration is the core of your contamination control strategy. Filters must trap 99.97% of particles 0.3 micrometers or larger (the FDA). A compromised HEPA filter is a critical finding that can shut down operations.
Your contamination control checklist must require annual HEPA filter integrity testing using aerosol photometry. This test involves introducing a challenge aerosol upstream of the filter and measuring particle concentration downstream. Any penetration above the specification threshold indicates filter failure. Document the test date, technician, filter location, upstream concentration, downstream concentration, and pass/fail result.
Inspect filters visually for damage, tears, or delamination. Look for discoloration, which may indicate moisture ingress or biological growth. Document every filter installation with the serial number, installation date, and initial integrity test results.
Verify that your facility has documented the HEPA filter specifications for each location: filter size, efficiency rating, airflow capacity, and installation orientation. Replacement filters must match these specifications exactly. Auditors will check that you’re not substituting cheaper filters with lower efficiency ratings.
Test the bypass seal around each filter frame. A properly sealed filter frame prevents unfiltered air from circumventing the HEPA media. Smoke testing or tracer gas testing can reveal leaks around the frame perimeter. This is a common audit finding that’s often overlooked until inspection.
Maintain spare HEPA filters on-site, particularly for critical cleanroom areas. Auditors expect to see evidence of supply chain planning. If your facility cannot replace a failed filter within 24 hours, that’s a vulnerability in your contamination control strategy.
Environmental monitoring is your real-time window into cleanroom performance. Particle counts, microbial sampling, and surface swabs provide objective evidence that your contamination control strategy is working.
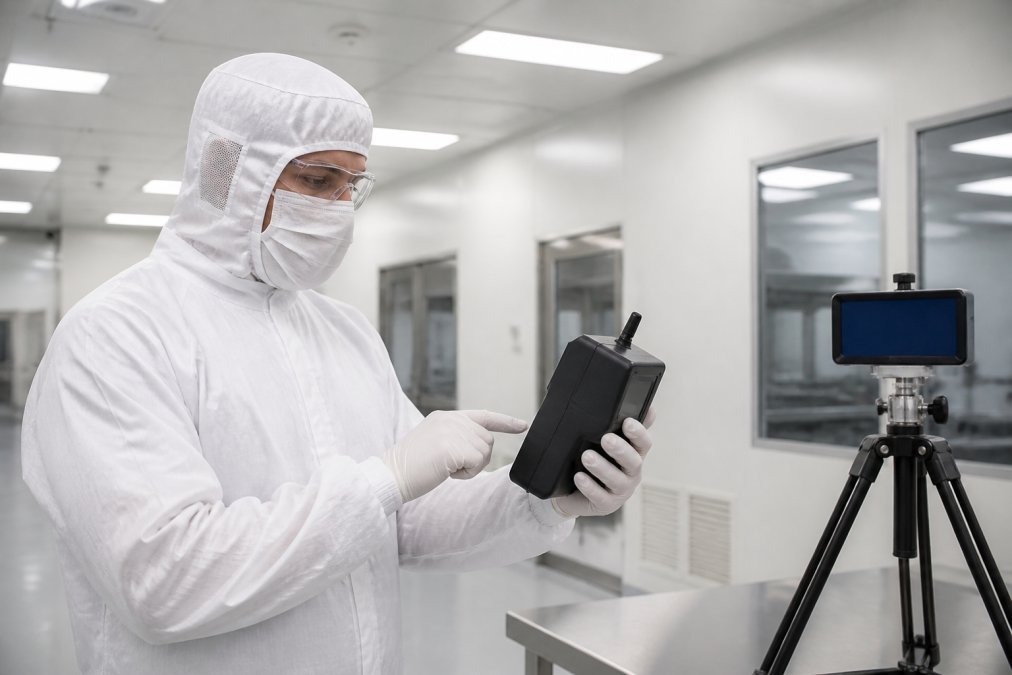
Laboratory technician using particle counter device to measure air quality while monitoring environmental data on digital display screen in cleanroom with soft LED lighting
Establish your baseline particle count specification. This depends on your ISO cleanroom classification. ISO Class 5 (Class 100) allows a maximum of 3,520 particles per cubic foot of 0.5 micrometers or larger (iso.org). Conduct particle counts at defined locations and frequencies, typically daily or weekly depending on your risk assessment. Use calibrated particle counters and document the date, time, location, particle size range, and count result.
Implement microbial sampling on a schedule appropriate to your operation. Settle plates, contact plates, and air samplers each provide different information. Settle plates detect viable particles falling from the air. Contact plates sample surface contamination. Air samplers actively draw air through a collection medium. Most pharmaceutical and biotech facilities conduct monthly or quarterly microbial sampling as part of their contamination control checklist.
Document action levels and alert limits. An alert limit triggers investigation before the specification is exceeded. An action limit requires immediate corrective action. For example, if your specification is 3,520 particles/cubic foot, your alert limit might be 2,500 and your action limit might be 3,000. This tiered approach prevents surprises during audits.
Maintain environmental monitoring records for a minimum of three years. Auditors will review trends. Increasing particle counts or microbial growth over time indicates a degrading contamination control strategy that requires investigation.
Integrate your monitoring data with your audit documentation system. Manual spreadsheets create transcription errors and make trending analysis difficult. Digital systems like Applied Physics’s CRMS automatically log readings, flag excursions, and generate trend reports that auditors expect to see.
Your contamination control strategy is the documented approach that ties together all other elements. It should explain how your facility identifies contamination risks, implements preventive controls, and responds to excursions.
Start with a risk assessment. Identify potential contamination sources: personnel, equipment, materials, air, water, and utilities. For each source, document the likelihood of contamination reaching your product and the severity of impact. This risk-based approach justifies why certain controls are stringent while others can be less rigorous.
Define your preventive controls. These are the ongoing actions that maintain your cleanroom environment: gowning procedures, airflow maintenance, HEPA filter replacement schedules, cleaning protocols, and environmental monitoring. Your contamination control checklist should reference each preventive control and specify its frequency. regulatory audit preparation.
Establish your corrective action procedure. When environmental monitoring shows an excursion, particle count spike, or microbial growth, what happens next? Your procedure should define investigation steps, root cause analysis, corrective actions, and verification that the corrective action is effective. Auditors will review past corrective actions to assess whether your team actually solves problems or just resets monitoring equipment.
Document your cleaning and disinfection procedures. Specify which cleaning agents are used in different areas, the frequency of cleaning, and the technique (manual wiping, automated systems, or both). For pharmaceutical operations, validate that your disinfectants are effective against your target organisms and that you rotate disinfectants to prevent resistance.
Address supply chain contamination risks. Incoming materials, components, and equipment can introduce contamination. Establish receiving procedures that inspect incoming items for cleanliness and integrity. Define quarantine areas where materials are held until inspection is complete. This is a gap that auditors increasingly focus on, many facilities have excellent internal controls but weak incoming material protocols.
Create a training and competency program. Personnel must understand the contamination control strategy and their role in maintaining it. Document initial training, refresher training intervals, and competency assessments. Include training on recognizing contamination risks and reporting anomalies.
Auditors spend most of their time reviewing documentation. A well-organized audit documentation template prevents them from having to dig through files and demonstrates that your facility takes record-keeping seriously.
Create a master index that maps every audit requirement to specific documents. This index should be the auditor’s first stop. It shows that you understand what they’re looking for and that you’ve prepared accordingly. Structure the index by topic: personnel training, airflow testing, HEPA filter integrity, environmental monitoring, corrective actions, and so on.
Prepare a cleanroom audit documentation template that standardizes how records are created and filed. This template should include fields for date, operator name, equipment ID, measurement results, and acceptance criteria. Consistency across records signals that your contamination control checklist is actually being followed, not just written.
Compile your environmental monitoring trends in a summary document. Rather than presenting 12 months of raw data, create a one-page summary showing average particle counts by location, trend direction, and any excursions with corrective actions. This helps auditors quickly understand your environmental performance.
Organize your corrective action records by date. For each past excursion or finding, document: what was observed, when it was detected, the root cause investigation, the corrective action taken, the date of verification, and the result. Auditors will sample these records to assess whether your contamination control strategy actually prevents recurrence.
Prepare a personnel training matrix showing every individual with cleanroom access, their training completion dates, and their refresher training schedule. Highlight any training that’s due within 30 days so auditors see that you’re proactive about maintaining competency.
Gather all equipment calibration certificates for monitoring instruments, pressure gauges, and particle counters. These should be current within the required intervals. If any instrument is out of calibration, document when it will be serviced and whether any monitoring data collected while out of calibration has been flagged as invalid.
Create a cleanroom audit documentation template for your facility’s unique systems. Include sections for FFU performance logs, filter replacement records, differential pressure logs, and any specialized monitoring specific to your operation. Auditors expect to see consistency between your written procedures and your actual records.
Most audit failures stem from preventable oversights. Understanding these mistakes helps you tighten your contamination control checklist before auditors arrive.
The first mistake is incomplete environmental monitoring records. Many facilities collect data but fail to document it properly. Missing dates, operator names, or equipment IDs make records look sloppy and raise questions about data integrity. Auditors assume that if the documentation is incomplete, the procedure itself was incomplete. Invest time in creating a standardized data collection form and training personnel to complete it fully.
The second mistake is inconsistency between written procedures and actual practice. Auditors observe operations and compare what they see to your documented procedures. If your gowning procedure specifies a 10-step sequence but personnel follow a 6-step shortcut, that’s a finding. Review your procedures annually and update them to reflect actual practice, or retrain personnel to follow written procedures.
A third mistake is failing to investigate and document corrective actions from previous audits. If an auditor found a deficiency two years ago and you’ve never documented what you changed, auditors assume the problem persists. Keep a log of all past audit findings and your response to each one.
The fourth mistake is underestimating the time required for audit preparation. Budget at least four weeks to assemble documentation, conduct pre-audit testing, and train personnel on audit procedures. Last-minute preparation always reveals gaps that can’t be fixed quickly.
The fifth mistake is assuming that equipment alone ensures compliance. A new particle counter or monitoring system doesn’t fix a contamination control strategy that’s poorly understood by personnel. Auditors evaluate the entire system, equipment, procedures, training, and culture.
If auditors identify deficiencies, your contamination control checklist becomes your remediation roadmap. A structured corrective action process demonstrates that you take findings seriously and have a plan to prevent recurrence.
When an audit finding is issued, assign responsibility immediately. One person should own the corrective action from investigation through verification. That person should document: the finding, the root cause analysis, the corrective action, the timeline for implementation, and the method for verifying effectiveness.
Root cause analysis is where many facilities fail. They address the symptom (e.g., “particles were elevated”) without understanding why (e.g., “the HEPA filter seal was compromised because the frame wasn’t installed correctly”). Dig deeper. Ask “why” five times if necessary. Auditors will ask how you’re preventing this specific failure from happening again.
Implement your corrective action on a defined timeline. If the finding is critical (immediate risk to product quality), implement within days. If it’s major (significant risk), implement within weeks. If it’s minor (low risk), you can take longer, but document your risk justification.
Verify that your corrective action actually worked. This is the step that auditors revisit most carefully. If you replaced a HEPA filter, conduct an integrity test to confirm the new filter passes. If you retrained personnel on gowning procedures, observe them performing the procedure and document that they meet the standard. Verification must be documented, auditors want to see evidence, not just your word.
Consider whether your corrective action should become a permanent change to your contamination control strategy. If you discovered that your cleaning procedure wasn’t effective, update the procedure, retrain personnel, and add it to your routine contamination control checklist. This prevents the same finding from recurring.
Document everything related to remediation. Create a corrective action file for each audit finding that includes the original finding, your investigation notes, your corrective action plan, implementation evidence, verification results, and the date you considered the corrective action complete. This file is your defense if the auditor returns and questions whether you actually fixed the problem.
Audit preparation is fundamentally about proving that your contamination control strategy is real, documented, and consistently executed. A comprehensive contamination control checklist for audit forces you to examine every element of your operation and demonstrate control. Applied Physics supports this process through precision monitoring equipment and airflow visualization technology that provides the objective evidence auditors expect. When you can show continuous environmental data, documented procedures, trained personnel, and a track record of effective corrective actions, auditors see a facility that takes contamination control seriously. Start your preparation now, address gaps before inspection, and use your audit as an opportunity to strengthen your entire contamination control strategy for the year ahead. Contact Applied Physics to discuss how our Cleanroom Monitoring System and aerosol photometer solutions can simplify your audit documentation and environmental monitoring protocols.
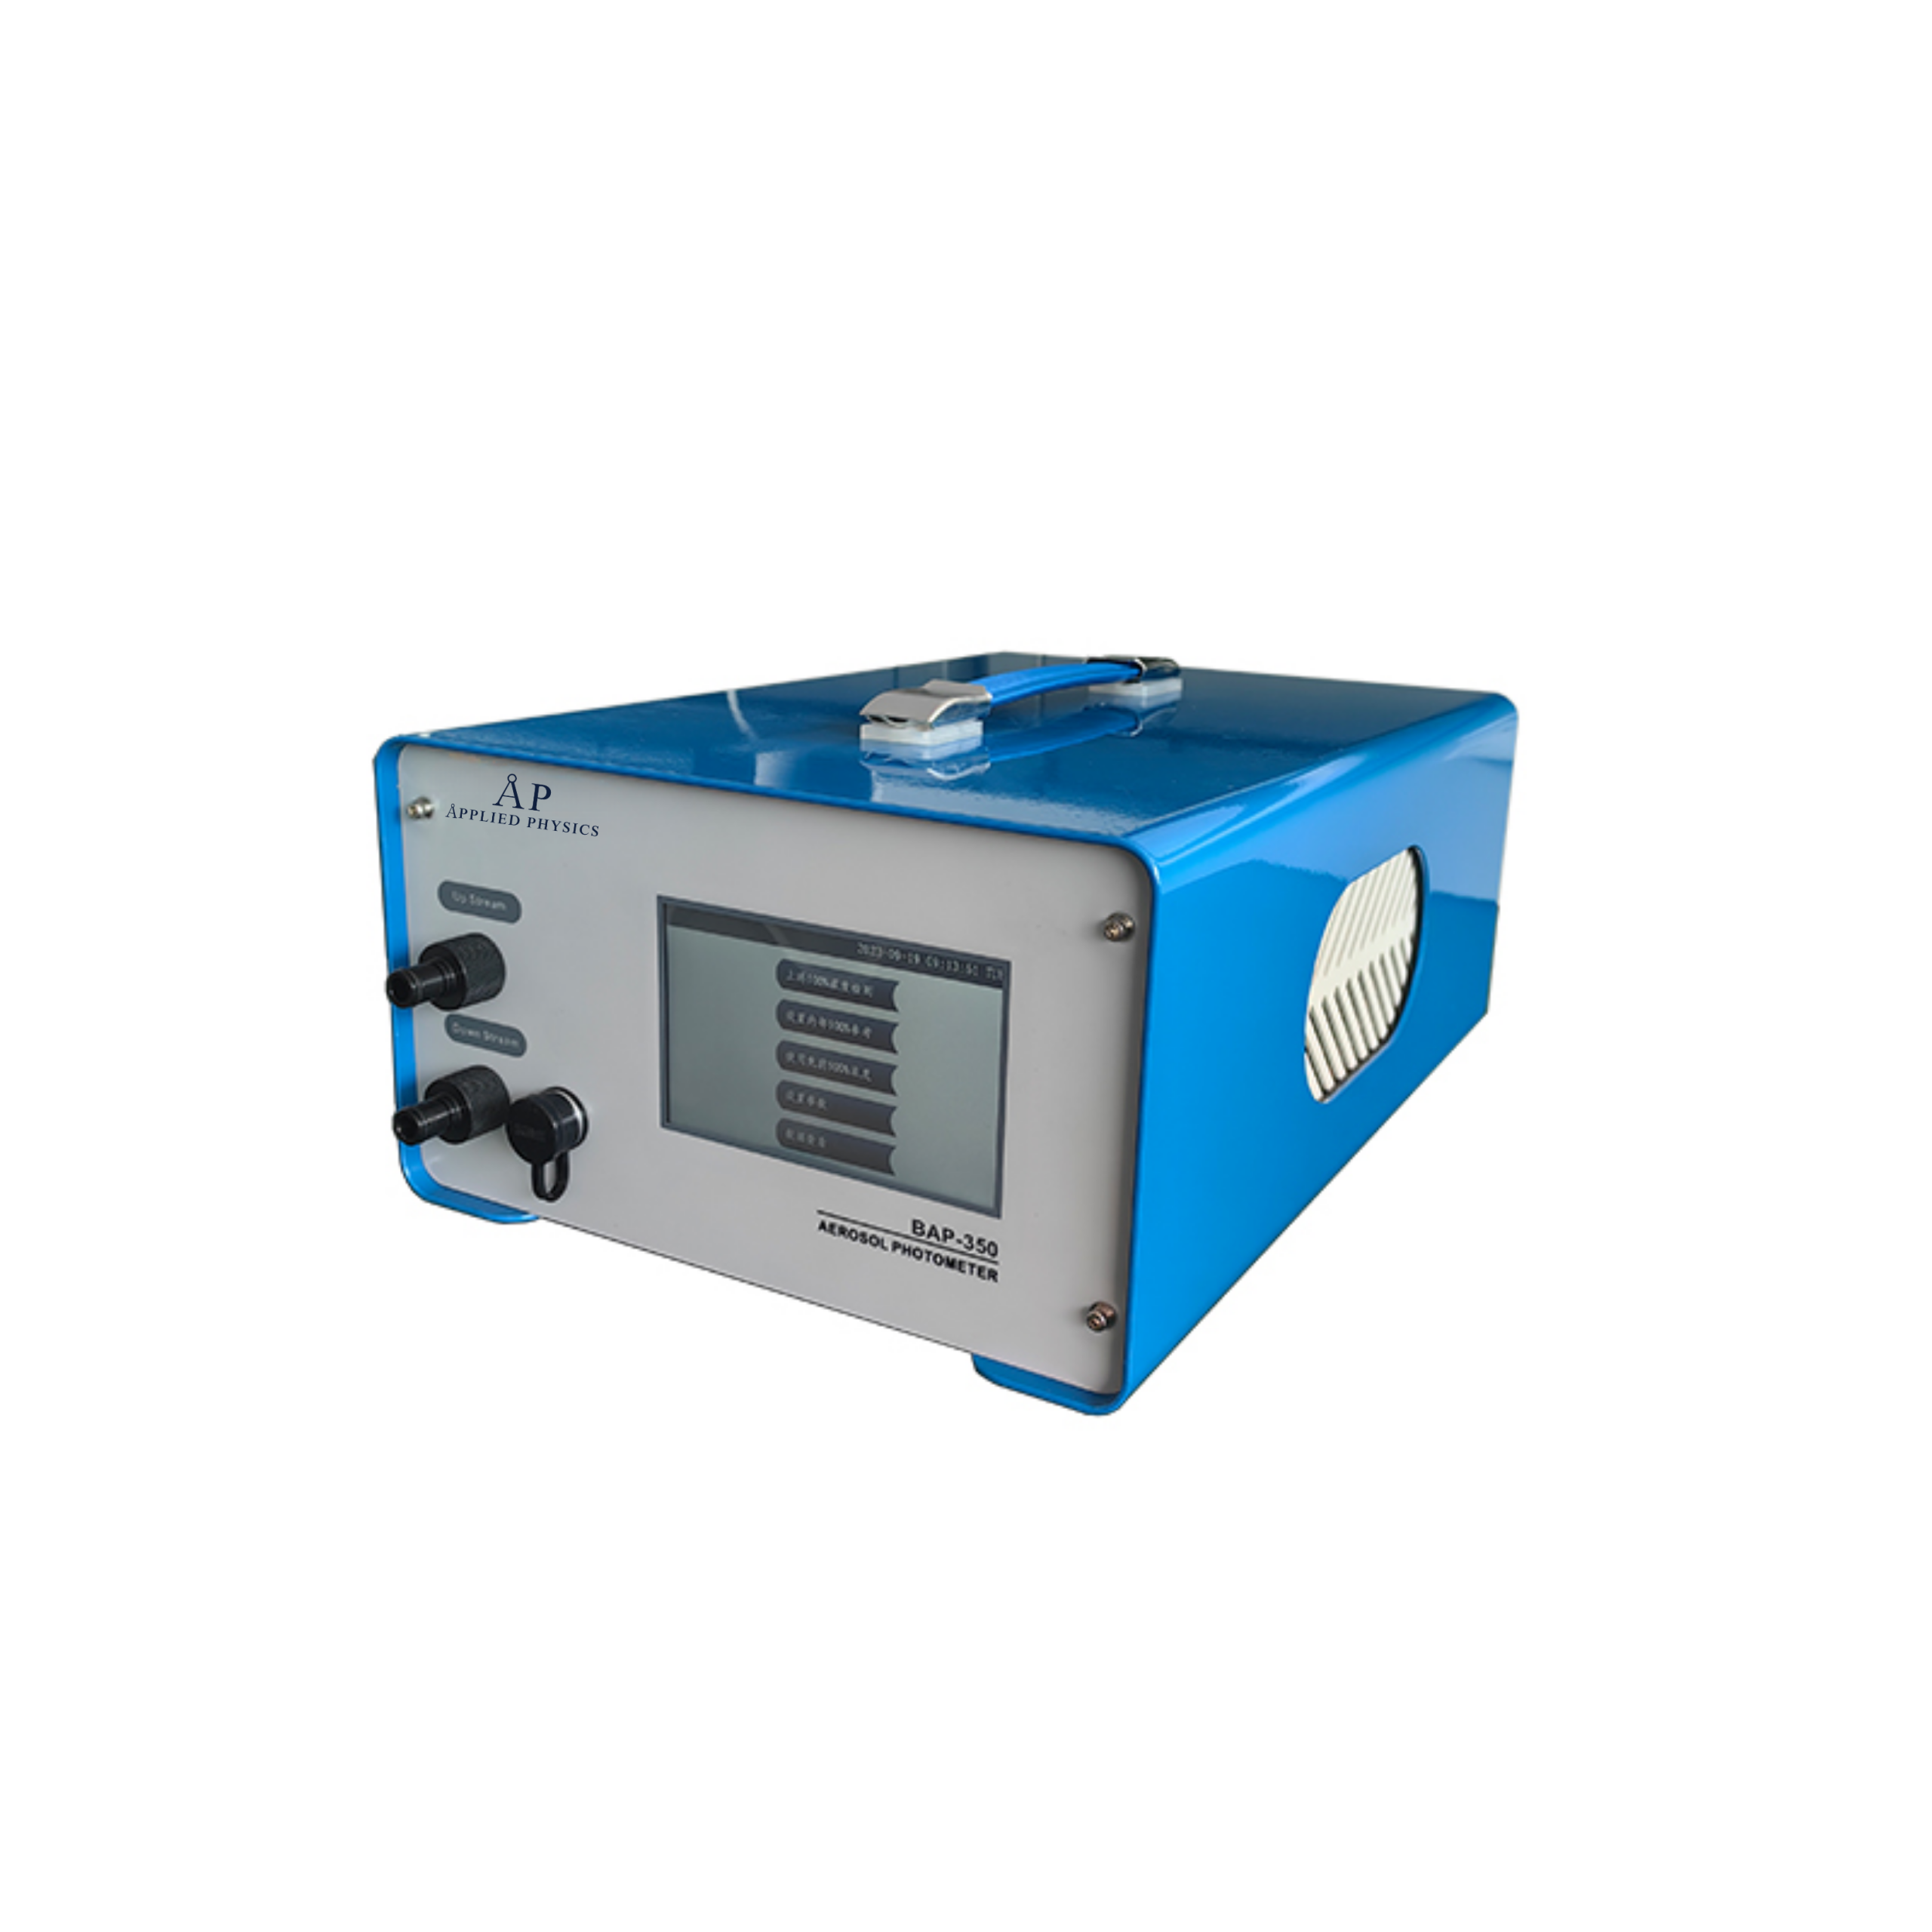
Aerosol Photometer BAP-350
A comprehensive contamination control checklist must cover six core areas: personnel gowning and hygiene practices, airflow and pressure differential verification, HEPA filter integrity testing, environmental monitoring (particle counts and microbial sampling), documentation and record keeping, and sanitation procedures. Each element directly supports ISO 14644 compliance and GMP requirements. The checklist should include specific acceptance criteria for each test, dates of verification, and corrective action records. Digital audit trails strengthen your readiness by creating timestamped evidence of compliance activities.
Regulatory standards and GMP guidelines typically require annual formal audits for ISO 14644-certified cleanrooms, with quarterly internal audits as best practice. Pharmaceutical facilities under USP 797/800 standards may require more frequent monitoring. After any equipment changes, personnel additions, or process modifications, conduct an interim audit. Continuous environmental monitoring systems provide real-time data between formal audits, allowing you to detect contamination trends early and address root causes before regulatory inspections occur.
Maintain records of all airflow tests, particle counts, microbial sampling results, HEPA filter certifications, personnel training logs, gowning procedure observations, and corrective action reports. Each record must include date, time, technician name, equipment used, acceptance criteria, and pass/fail status. A cleanroom audit documentation template should standardize this format across your facility. Digital systems with audit trails provide traceable evidence that documentation wasn’t altered post-inspection, which auditors specifically look for during compliance reviews.
Cleanroom airflow visualization testing uses tracer particles or smoke to confirm pressure differentials, air change rates, and laminar flow patterns meet ISO 14644 classification requirements. This visual verification demonstrates that contamination is being actively removed from critical zones. Proper airflow prevents cross-contamination between work areas and validates that gowning rooms, production zones, and storage areas maintain the correct pressure hierarchy. Documenting airflow visualization results with timestamped records provides auditors with clear evidence of your contamination control strategy effectiveness.
APPLIED PHYSICS TECHNICAL RESOURCE
Airflow visualization, smoke studies, tracer delivery, particle monitoring and controlled-environment validation. Product and standards references should be interpreted for the actual instrument, facility, protocol and configuration.

Enter your details below to save your shopping cart for later. And, who knows, maybe we will even send you a sweet discount code :)
Allow notifications to get real-time updates about your shopping cart and who knows, you may even receive a sweet discount code 😊