
Table of Contents
- What Is Cleanroom Validation and Why It Matters
- Risk Assessment for Cleanroom Contamination: Your Starting Point
- ISO 14644-1 Testing Procedures: The Regulatory Framework
- Step 1: Establish Your Cleanroom Contamination Control Strategy Template
- Step 2: Conduct Environmental Monitoring and Particle Counts
- Step 3: Perform Airflow Visualization for Cleanrooms and Velocity Testing
- Step 4: Validate HEPA Filter Integrity and Air Change Rates
- Step 5: Test Disinfectant Efficacy and Gowning Protocols
- Common Validation Failures and How to Troubleshoot Them
- Data Integrity and Documentation for Regulatory Compliance
- Frequently Asked Questions
Last Updated: August 31, 2026
What Is Cleanroom Validation and Why It Matters
Cleanroom validation is the systematic process of demonstrating that a controlled environment meets defined specifications for contamination control. At Applied Physics, we understand that how to validate cleanroom contamination controls isn’t just a regulatory checkbox, it’s the foundation of product quality, operator safety, and manufacturing compliance.
When you validate cleanroom contamination controls, you’re proving that your facility can consistently produce products free from particulate, microbial, and chemical contamination. This matters because a single failure in contamination control can compromise entire product batches, trigger regulatory action, or worse, harm end users. Pharmaceutical manufacturers, semiconductor fabs, and biotech research centers don’t have the luxury of guessing whether their cleanrooms actually work.
The validation process addresses three critical questions: Does your cleanroom meet its design specifications? Can it maintain those specifications over time? Are your contamination control strategies actually preventing the contaminants that matter most to your process? The answers determine whether your facility remains compliant with ISO 14644-1, EU GMP Annex 1, USP 797, or whatever regulatory framework governs your operation.
Cleanroom validation proves your facility can consistently control contamination to the levels your process requires, not just once, but continuously over months and years of operation.
Risk Assessment for Cleanroom Contamination: Your Starting Point
Every successful validation begins with a risk assessment. Before you test airflow patterns, particle counts, or HEPA filter integrity, you need to identify what contaminants actually threaten your product and process. This is where most teams stumble, they validate what’s easy to measure instead of what matters most.
Start by mapping your process. What could go wrong? A pharmaceutical compounding operation faces different contamination risks than a semiconductor wafer fabrication facility. Viable microbial contamination is catastrophic in pharma; sub-10nm particles can destroy semiconductor yields. Your risk assessment drives which contamination control parameters you monitor, how frequently you monitor them, and what acceptance criteria you set.
Document your contamination control strategy by identifying the sources, pathways, and impacts of potential contaminants. This becomes your template for validation. You’ll reference it constantly, when designing your facility, during qualification, and throughout ongoing environmental monitoring. The strategy answers: What cleanliness classification do you need? What monitoring points matter? How will you detect deviations before they affect product?
A risk-based approach is far more efficient than trying to validate everything. You focus resources on the parameters that actually control your critical contamination sources. This saves time, reduces downtime during validation, and produces a validation package that regulators recognize as thoughtful rather than box-checking.
Document your contamination control strategy before you design any test. This single document becomes the reference for your entire validation program and helps auditors understand your approach immediately.
ISO 14644-1 Testing Procedures: The Regulatory Framework
ISO 14644-1 defines the cleanliness classification system and testing procedures that apply to most regulated cleanrooms. Understanding this standard isn’t optional, it’s the language regulators speak when they inspect your facility. The standard specifies which particles you measure, at what size thresholds, and which airflow patterns matter most.
The standard classifies cleanrooms from ISO Class 1 (most stringent) through ISO Class 9 (least stringent), based on particle counts per cubic meter. A pharmaceutical sterile compounding pharmacy typically operates ISO Class 5 or better (the FDA). A semiconductor fab working on advanced nodes requires ISO Class 3 or better in critical areas. The classification you choose drives every subsequent validation decision.
ISO 14644-1 also defines the testing procedures: how to measure particle counts, how to perform airflow visualization, what equipment you need, and how to document results. The standard requires that you test during three operational states: At-Rest (cleanroom empty, systems running), As-Built (after construction, before equipment installation), and In-Operation (with personnel and equipment present, simulating actual use).
Many teams miss a critical point: the standard requires you to demonstrate not just that your cleanroom meets its classification, but that it recovers to specification after disturbances. Recovery time is part of your validation. If your cleanroom takes eight hours to return to ISO Class 5 after a door opens, that’s a problem you need to address through your contamination control strategy, not ignore.
Step 1: Establish Your Cleanroom Contamination Control Strategy Template
Your contamination control strategy template is the master document that guides every subsequent validation activity. This isn’t a generic checklist, it’s a facility-specific plan that identifies your contamination risks and how you’ll control them.
Start with a process flow diagram showing how materials, personnel, and equipment move through your cleanroom. Mark every potential contamination source: air intakes, personnel entries, material airlocks, drain points, and equipment interfaces. For each source, identify what contaminants it could introduce and what harm they could cause to your product.
Next, specify your contamination control measures. Will you use unidirectional airflow or turbulent airflow? How many air changes per hour? What gowning protocol will you require? What disinfectants will you use, and how often? Which monitoring points will you use to detect contamination? Your strategy should answer every “how” and “why.”
Document your acceptance criteria for each control measure. If you’re validating airflow visualization, what velocity do you need in your critical zones? If you’re testing HEPA filter integrity, what pressure differential indicates a passing test? If you’re monitoring viable particles, what’s your alert level and action level? These numbers come from your process requirements, not from industry averages.
Include a change control procedure in your template. Cleanrooms evolve, you’ll modify layouts, upgrade equipment, adjust airflow patterns. Your template should specify how you’ll assess whether changes require re-validation or just documentation. This prevents you from accidentally invalidating your qualification through undocumented modifications.
A contamination control strategy that exists only in someone’s head is worthless. Write it down, get it approved, and reference it constantly. Regulators expect to see this document during inspections.
Step 2: Conduct Environmental Monitoring and Particle Counts
Environmental monitoring is your ongoing proof that contamination control is working. Particle counting measures non-viable particles (dust, skin cells, fibers); microbial sampling measures viable particles (bacteria, fungi). Together, they tell you whether your cleanroom is actually clean.
Non-viable particle counting uses optical particle counters that measure particles by size. You’ll count particles at multiple size thresholds, typically 0.5 micrometers, 5 micrometers, and larger. The counts must fall within your ISO classification limits at each monitoring location. A single location exceeding limits means you’ve failed that test point, and you need to investigate why.
Set up a grid of monitoring locations based on your cleanroom layout and contamination risk. High-traffic areas, material entry points, and equipment interfaces need more frequent monitoring than low-risk zones. Document the exact coordinates of each monitoring point so you can repeat measurements in the same locations during future monitoring.
Microbial monitoring uses air samplers that collect airborne bacteria and fungi onto agar plates, which are then incubated and counted. The Applied Physics Microbial Air Sampler 3080 Series is designed specifically for this purpose, delivering precise, reliable sampling of microbial contamination in cleanroom environments. Viable particle limits are typically much lower than non-viable limits because a single viable particle can grow into a contaminating colony.
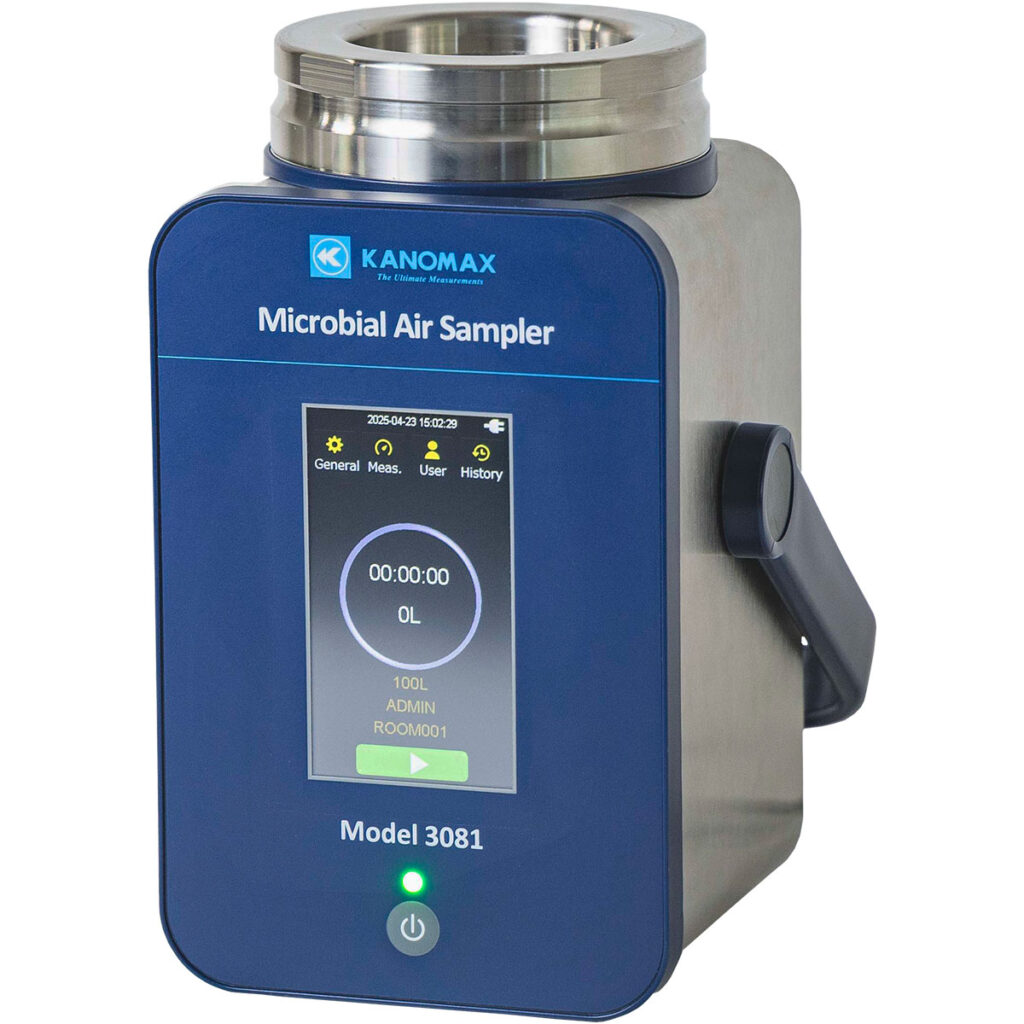
Establish alert and action levels for both particle types. An alert level triggers investigation and corrective action. An action level triggers immediate response, potential shutdown, and root cause analysis. Your contamination control strategy should define these levels based on your process requirements.
Frequency matters. During qualification, you’ll monitor continuously or at short intervals. During ongoing operation, you might monitor weekly, monthly, or quarterly depending on your risk assessment and regulatory requirements. Document every measurement, including date, time, location, particle sizes, and operator identity.
Step 3: Perform Airflow Visualization for Cleanrooms and Velocity Testing
Airflow visualization shows you whether air actually moves in the pattern you designed. You can’t assume your HEPA filters produce the airflow you specified, you have to prove it. This is where smoke or aerosol visualization reveals the truth about your cleanroom’s air distribution.
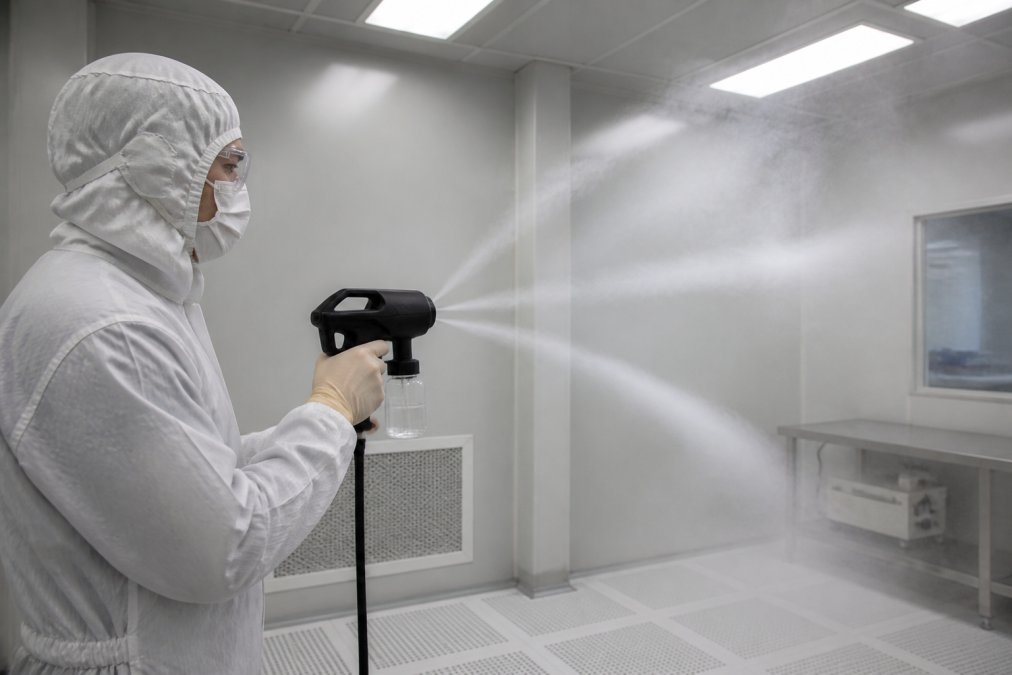
Unidirectional airflow cleanrooms (ISO Class 4 and better) require laminar flow, air moving in parallel lines from ceiling to floor or wall to wall. You visualize this using smoke or aerosol generators that create visible particles you can photograph or record. The aerosol should move in smooth, parallel paths without turbulence or dead zones. Swirling, eddying, or stagnant areas indicate problems with your HEPA filter placement, return air locations, or obstruction patterns.
Turbulent airflow cleanrooms (ISO Class 5 and lower) don’t require laminar flow, but they still need adequate air mixing and removal. Visualization in turbulent cleanrooms shows whether air reaches all areas and carries contaminants toward exhaust points. Dead zones where air stagnates are problems in any cleanroom type.
Velocity testing measures the speed of airflow at specific points. Unidirectional airflow typically requires 0.3 to 0.5 meters per second (60 to 100 feet per minute) (iso.org). You measure velocity using a hot-wire anemometer or thermal anemometer at multiple points across your cleanroom. Velocity that’s too low indicates filter degradation or blockage. Velocity that’s too high can create turbulence and actually increase contamination in some situations.
Document airflow patterns photographically. Take images or video showing aerosol movement at different heights and locations. Include velocity measurements at a grid of points. This documentation proves your airflow meets your design specifications and becomes your baseline for future comparison.
Perform airflow visualization during all three operational states: At-Rest, As-Built, and In-Operation. Personnel and equipment placement changes airflow patterns, you need to validate under actual working conditions.
::: meet infrastructure specifications.
Step 4: Validate HEPA Filter Integrity and Air Change Rates
Your HEPA filters are the core of your contamination control strategy. They remove 99.97% of particles 0.3 micrometers and larger, assuming they’re intact and functioning properly. A single pinhole leak in a HEPA filter can bypass your entire filtration system, which is why integrity testing is non-negotiable.
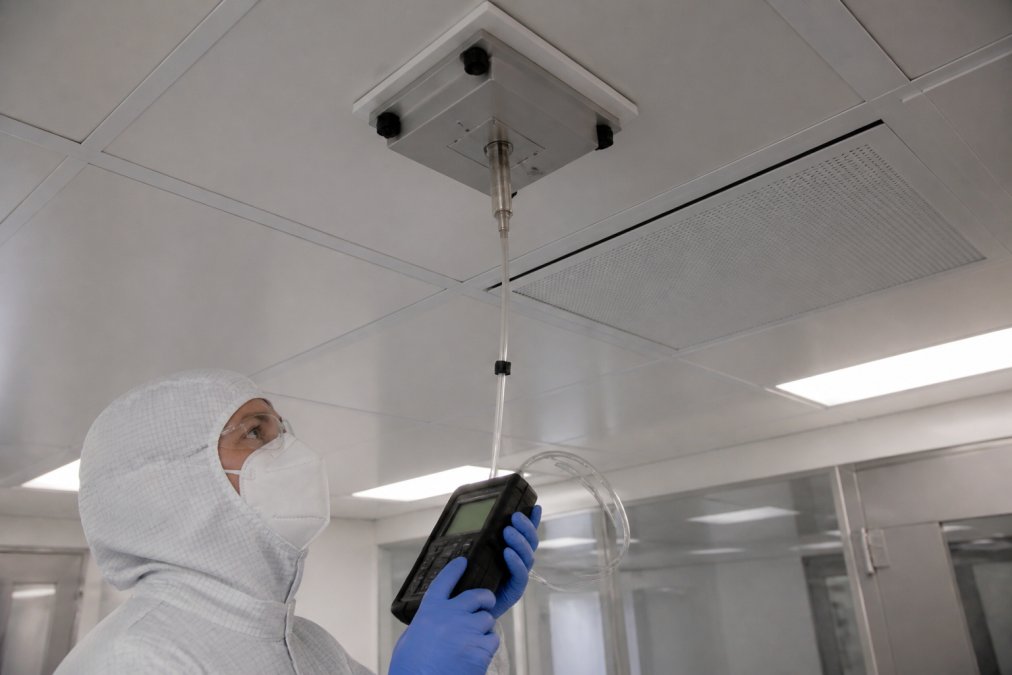
HEPA filter integrity testing uses aerosol challenge testing. You introduce a known concentration of aerosol particles upstream of the filter and measure the concentration downstream. The ratio of downstream to upstream concentration tells you the filter’s efficiency. An intact HEPA filter should show a penetration rate below 0.03% (meaning 99.97% or better removal) (the CDC). Any higher penetration indicates a filter failure that requires immediate replacement.
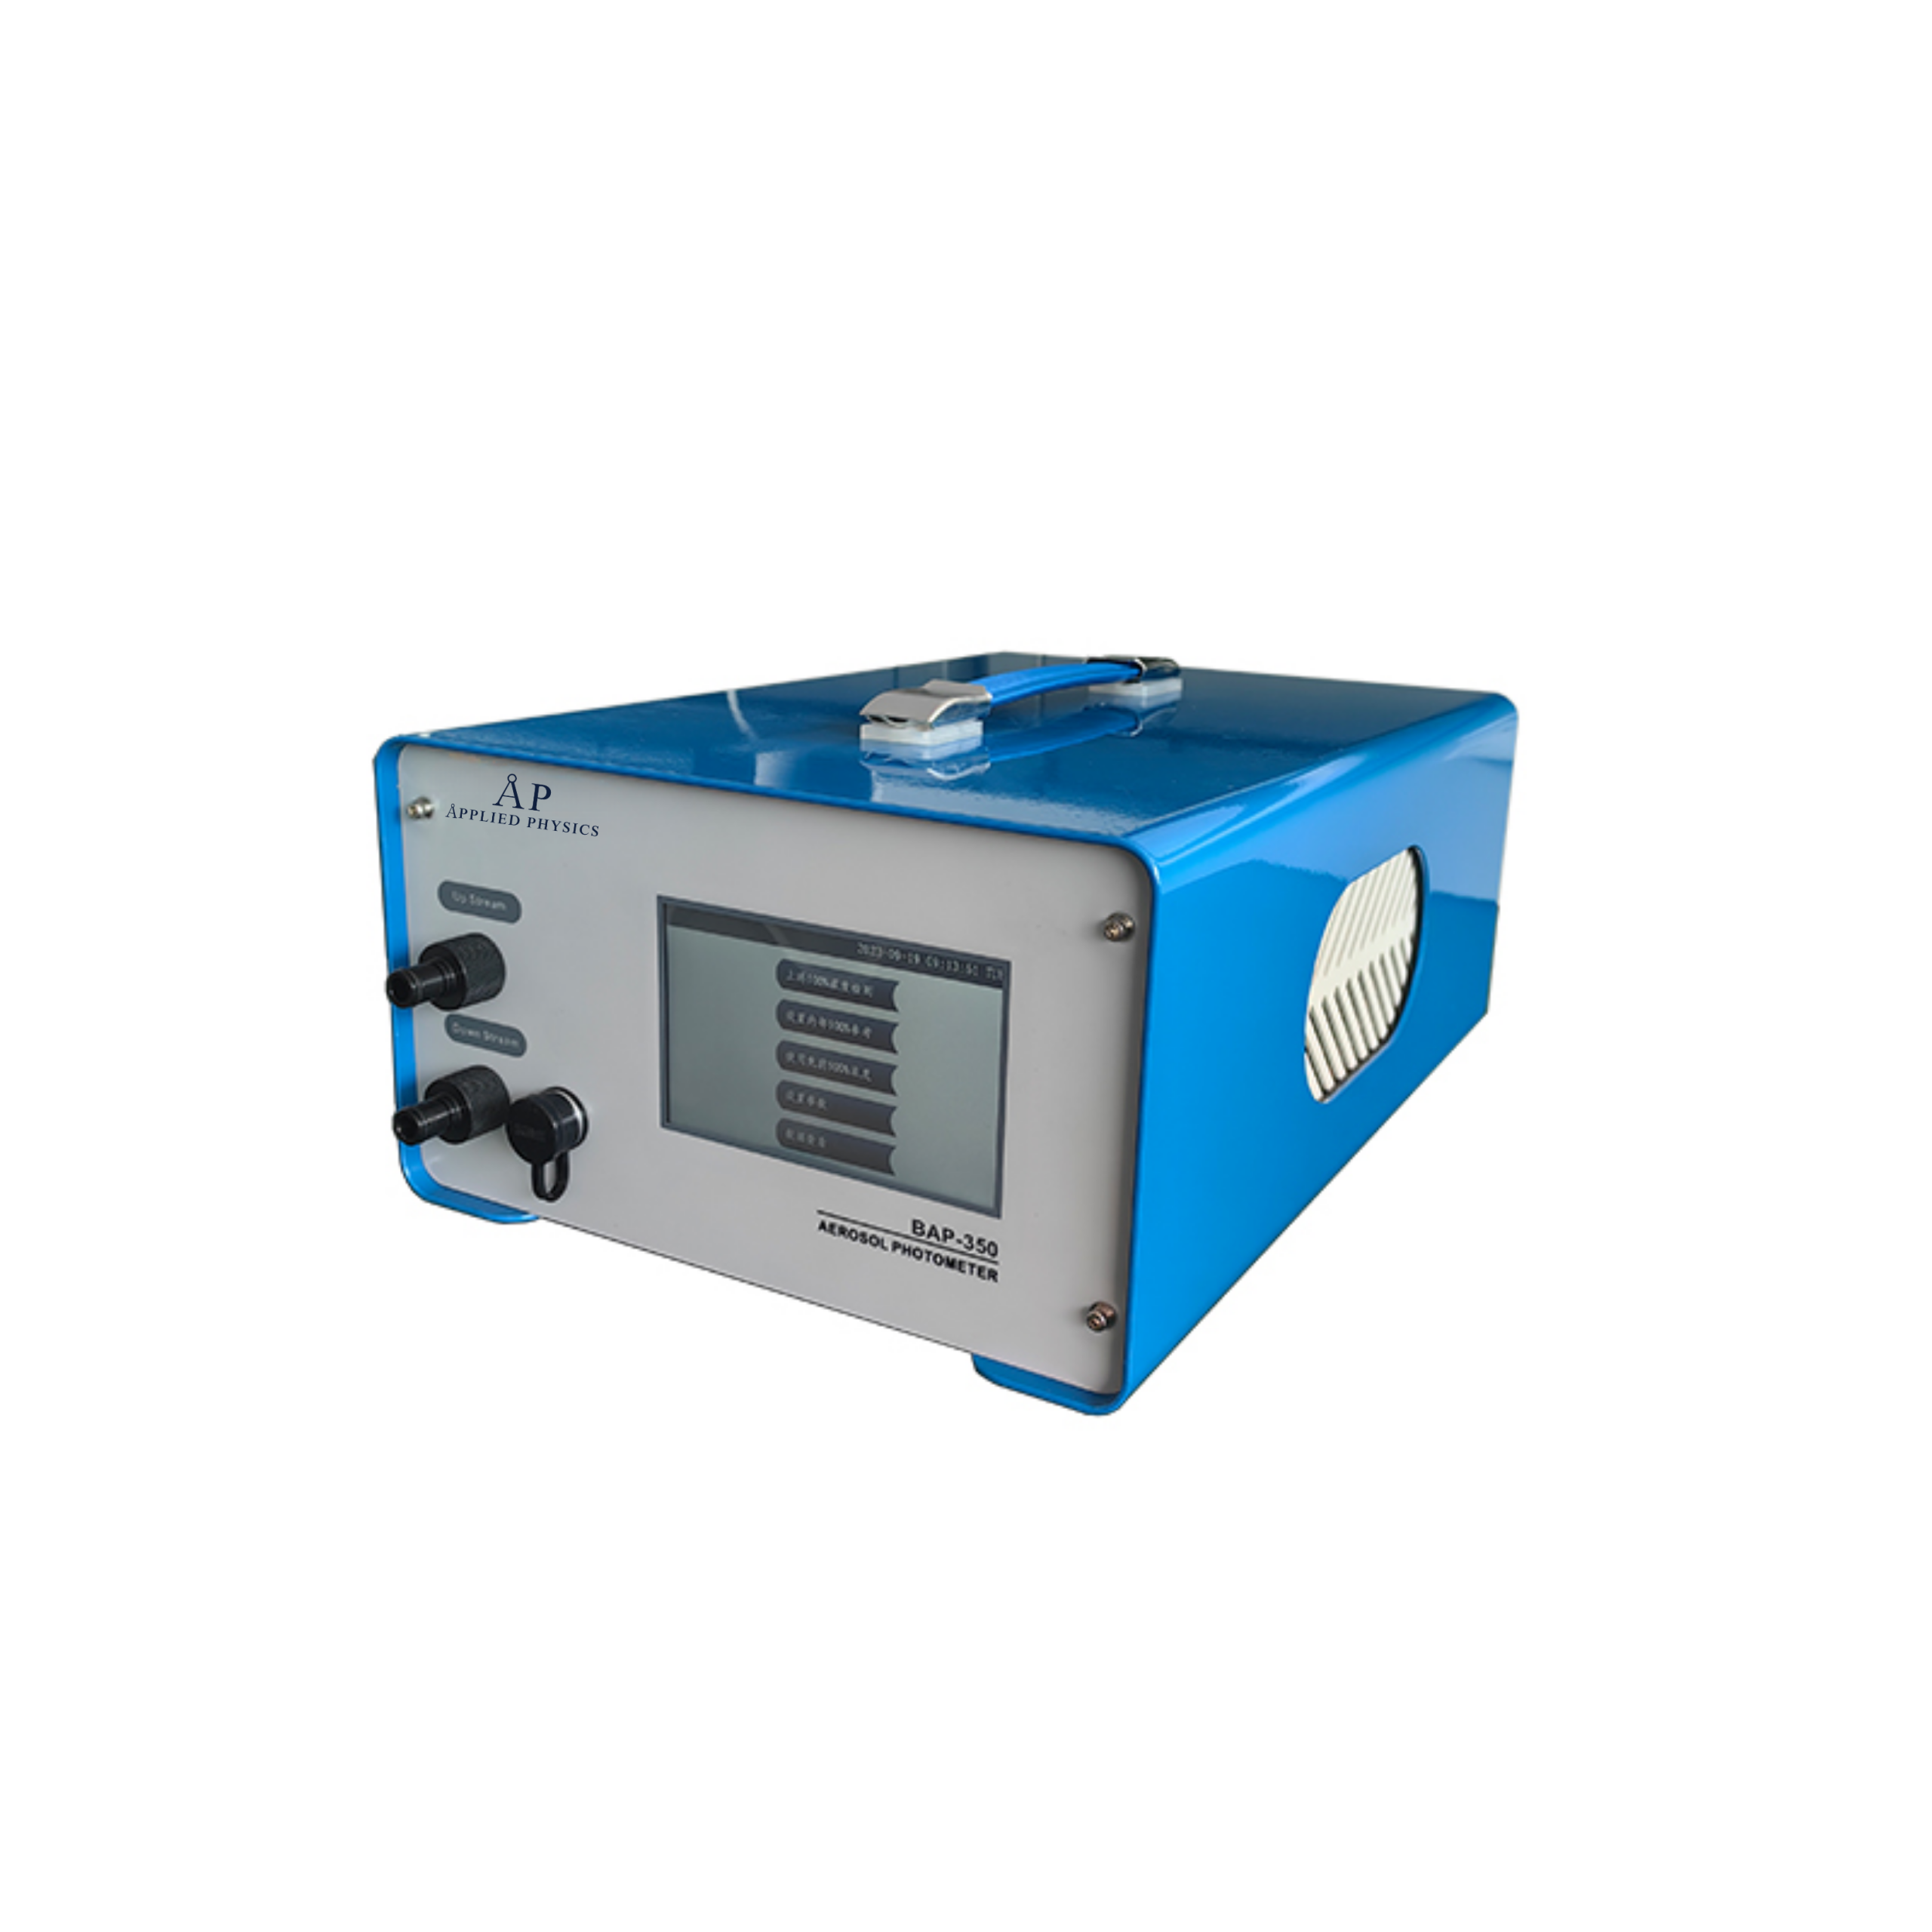
The Applied Physics Aerosol Photometer BAP-350 is specifically designed for HEPA validation and filter integrity testing, delivering the precision needed for cleanroom certification. This equipment measures aerosol concentration accurately enough to detect even small filter degradation before it becomes a compliance issue.
Pressure differential across the HEPA filter is your daily monitoring tool. A healthy filter maintains a specific pressure drop, typically 0.5 to 1.5 inches of water column, depending on your filter design. As the filter loads with particles, pressure differential increases. When it reaches your maximum allowable limit, the filter needs replacement. Monitor pressure differential continuously or at regular intervals. A sudden increase indicates a potential leak or blockage that requires investigation.
Air change rate is the number of times per hour that all air in your cleanroom is replaced. ISO 14644-1 doesn’t specify a required air change rate, instead, it specifies the cleanliness classification you must achieve. However, your contamination control strategy likely specifies a target air change rate based on your process. Measure air change rate by releasing a tracer gas and measuring how long it takes to reach background levels. Typical cleanrooms operate at 10-20 air changes per hour, but some critical areas require 30 or more.
Document filter integrity test results, pressure differential readings, and air change rate measurements. These become your baseline data. Future monitoring will compare against these baselines to detect degradation.
Step 5: Test Disinfectant Efficacy and Gowning Protocols
Disinfectants are part of your contamination control strategy, but only if they actually work in your cleanroom environment. A disinfectant validated in a laboratory might fail in your actual operating conditions, different surfaces, temperatures, humidity levels, or contact times can dramatically affect efficacy.
Disinfectant efficacy validation tests whether your chosen disinfectant actually kills or removes the microorganisms most likely to contaminate your process. You’ll typically test against relevant organisms: Staphylococcus aureus for pharmaceutical cleanrooms, Bacillus species for more resistant organisms, and whatever organisms are relevant to your specific risk assessment.
Validation includes testing contact time, how long the disinfectant must remain on a surface to achieve the kill rate you need. A disinfectant that requires 10 minutes of contact time is impractical if your gowning procedure allows only 2 minutes. Your validation must prove that your actual use conditions achieve your required microbial reduction.
Test your disinfectant on the actual surfaces in your cleanroom, stainless steel, epoxy flooring, plastic equipment frames. Different surfaces can affect disinfectant performance. Document the results and establish standard operating procedures that specify which disinfectant to use, how to apply it, and how long it must remain on surfaces.
Gowning protocols are your personnel contamination control measure. Your protocol specifies what garments personnel must wear, in what order they put them on, and what hand hygiene steps they must follow. Gowning validation proves that your protocol actually reduces the microbial and particulate contamination that personnel would otherwise introduce.
Validate gowning by collecting particles or microorganisms from gowned personnel under simulated work conditions. Compare results to ungowned personnel or personnel using different gowning protocols. Your validation should show that your specified protocol reduces contamination to acceptable levels. Document the results and establish it as your standard operating procedure.
:::takeaway
Disinfectant efficacy and gowning protocols are only valid if tested under your actual operating conditions, not under laboratory conditions that don’t match your facility.
Common Validation Failures and How to Troubleshoot Them
Validation tests fail more often than many teams expect. A failed test isn’t necessarily a disaster, it’s information. The key is understanding why it failed and fixing the root cause rather than just retesting until you pass.
Particle counts exceeding limits usually indicate one of three problems: HEPA filter degradation, inadequate air changes, or uncontrolled contamination sources. Start by checking your HEPA filter pressure differential. If it’s higher than normal, the filter is loading and may be near the end of its service life. If pressure differential is normal but particle counts are high, investigate contamination sources, is your gowning protocol being followed? Are material entry procedures creating dust? Are personnel spending time in areas they shouldn’t be?
Airflow visualization failures typically show dead zones, turbulent areas, or flow patterns that don’t match your design. Dead zones often result from equipment placement that blocks airflow. Moving equipment or modifying your layout can fix this. Turbulent areas might indicate that your HEPA filter installation isn’t producing true laminar flow, check that filters are properly sealed and that return air paths aren’t disrupting the flow pattern.
HEPA filter integrity test failures indicate a filter leak. The filter must be replaced immediately, don’t attempt to repair it. After replacement, retest to confirm the new filter passes. If a new filter also fails integrity testing, the problem might be in your filter installation or housing. Inspect the filter frame, gaskets, and mounting system for gaps or damage.
Microbial monitoring failures are particularly concerning because they indicate that viable organisms are present in your cleanroom. Investigate immediately: Has your disinfectant protocol been followed? Has gowning protocol changed? Is there a new contamination source? Viable contamination often points to a procedural failure rather than a facility problem. Review your standard operating procedures with personnel and reinforce compliance.
Disinfectant efficacy failures mean your chosen disinfectant isn’t working as expected. This might happen if contact time is too short, if the surface is dirty (disinfectants work poorly on soiled surfaces), or if the disinfectant has degraded. Extend contact time, improve cleaning procedures, or switch to a different disinfectant. Revalidate after making changes.
Data Integrity and Documentation for Regulatory Compliance
Your validation data is your proof of compliance. Regulators will review it during inspections. If your documentation is incomplete, contradictory, or poorly organized, they’ll question whether your validation actually happened or whether you’re just going through the motions.
Data integrity means your records are accurate, complete, and traceable. Every measurement should include: date, time, location, operator name, equipment used, results, and any deviations or observations. If a test failed, document what you did about it. If you retested, document the retest results. If you changed your procedure based on a failure, document the change and the reason.
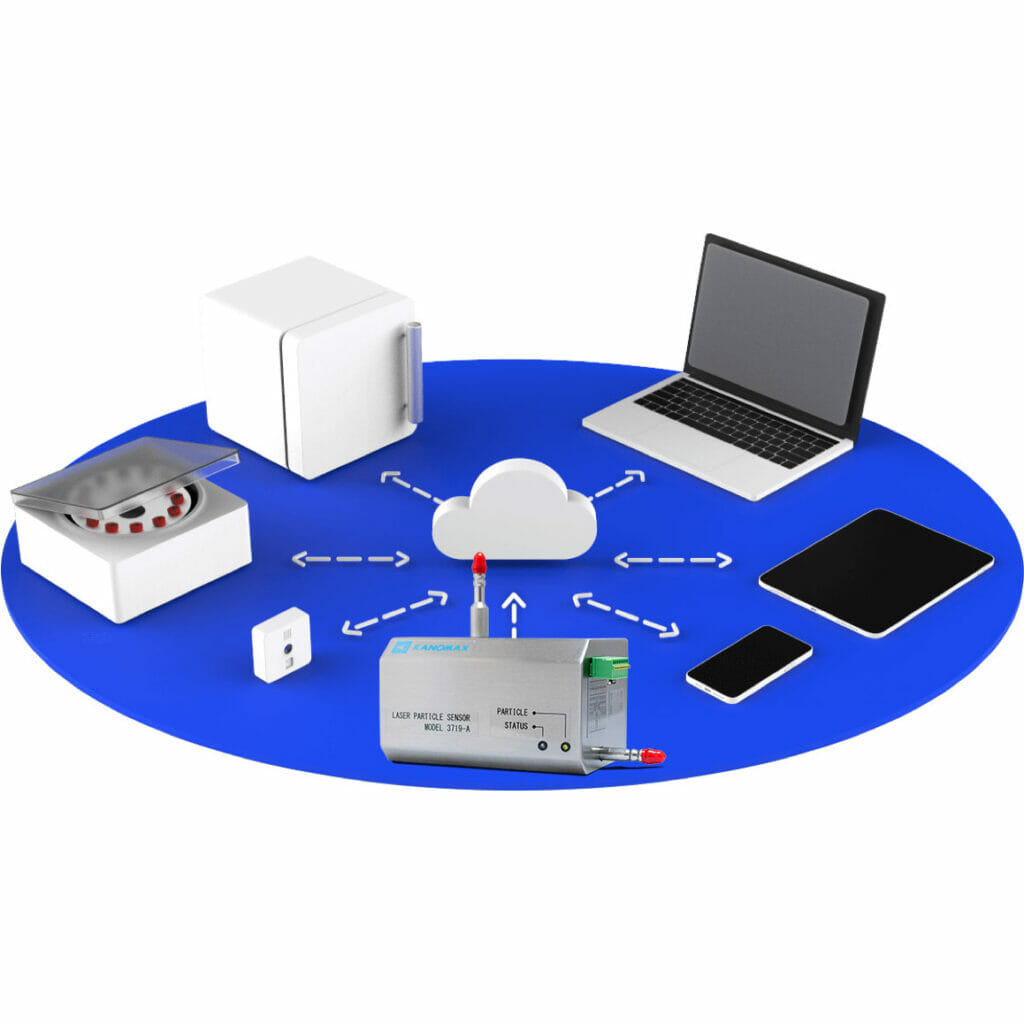
Use the Applied Physics Cleanroom Monitoring System (CRMS) for continuous environmental monitoring. This fully integrated solution captures data automatically, eliminating manual transcription errors and ensuring consistent documentation. The system maintains audit trails showing who collected data, when, and what the results were.
Establish a document control system for your validation records. Keep originals in a secure location. Create a master file for your facility validation that includes: contamination control strategy, risk assessment, design specifications, test procedures, test results, acceptance criteria, and corrective actions. This master file should be organized chronologically so an auditor can follow your validation story from start to finish.
Include photographs and videos in your documentation. Airflow visualization images, equipment setup photos, and video recordings of particle removal demonstrate your validation more effectively than numbers alone. Regulators appreciate visual evidence that you actually performed the tests you documented.
Establish a schedule for re-validation. Cleanrooms don’t stay validated forever. Your contamination control strategy should specify when you’ll repeat validation tests, typically annually or after any significant facility modifications. Document these repeat validations the same way you documented the initial validation.
Create a deviation log. When your cleanroom fails to meet specifications, document the failure, your investigation, and your corrective action. This log shows regulators that you’re actively monitoring your facility and responding to problems. A facility with a detailed deviation log and corrective actions is more credible than one claiming zero deviations.
Cleanroom validation is demanding work that requires precision, attention to detail, and a genuine commitment to contamination control. The stakes are high, your validation determines whether your products are safe and effective. Applied Physics has supported cleanroom validation since 1992, providing the precision contamination control and airflow visualization equipment that facilities need to demonstrate compliance with ISO 14644-1, EU GMP Annex 1, and USP standards. Our team understands the specific challenges of semiconductor metrology, pharmaceutical manufacturing, and biotech research environments. Contact us to discuss how our contamination control solutions and monitoring systems can support your facility’s validation program and keep your cleanroom performing at the highest standards.
Frequently Asked Questions
What is the difference between viable and non-viable particle monitoring in cleanroom validation?
Non-viable particles are inert dust, fibers, and contaminants counted by optical particle counters; viable particles are microorganisms (bacteria, fungi) sampled through air samplers. Both matter for cleanroom validation. Non-viable monitoring catches physical contamination and HEPA filter performance; viable monitoring detects microbiological risks critical for pharmaceutical and sterile compounding environments. Most facilities perform both simultaneously to meet ISO 14644-1 and USP 797 requirements.
How often should you validate cleanroom contamination controls?
Initial validation occurs during Installation Qualification (IQ), Operational Qualification (OQ), and Performance Qualification (PQ). Ongoing monitoring happens continuously or at scheduled intervals (daily, weekly, monthly depending on classification). Revalidation is required after equipment changes, facility modifications, failed tests, or regulatory inspection findings. Many facilities validate quarterly or semi-annually to maintain compliance and catch drift before problems occur.
Can you validate a small glove box or modular cleanroom using the same ISO 14644-1 procedures as a large facility?
Yes, but with practical adjustments. Smaller spaces require scaled-down equipment and modified testing zones, but the fundamental procedures remain: particle count sampling, airflow visualization, HEPA integrity testing, and microbiological monitoring. The key is documenting your risk assessment and tailoring acceptance criteria to your specific application. Modular cleanrooms benefit from risk-based validation approaches that focus testing on high-risk zones rather than exhaustive full-facility protocols.
What happens if your cleanroom fails a validation test, can you remediate and retest?
Yes. Document the failure, identify the root cause (filter leaks, pressure loss, gowning breach, disinfectant ineffectiveness), and implement corrective actions. Common fixes include HEPA filter replacement, airflow adjustment, sealing leaks, retraining personnel, or changing disinfectants. After remediation, retest the specific failed parameter. If multiple failures occur or root cause is unclear, conduct a full revalidation. Keep all failure and remediation records for regulatory audits.
