
ELGA water purification systems, the UV chamber balances high-voltage lamp electronics against a continuous stream of pressurized, ultrapure water.
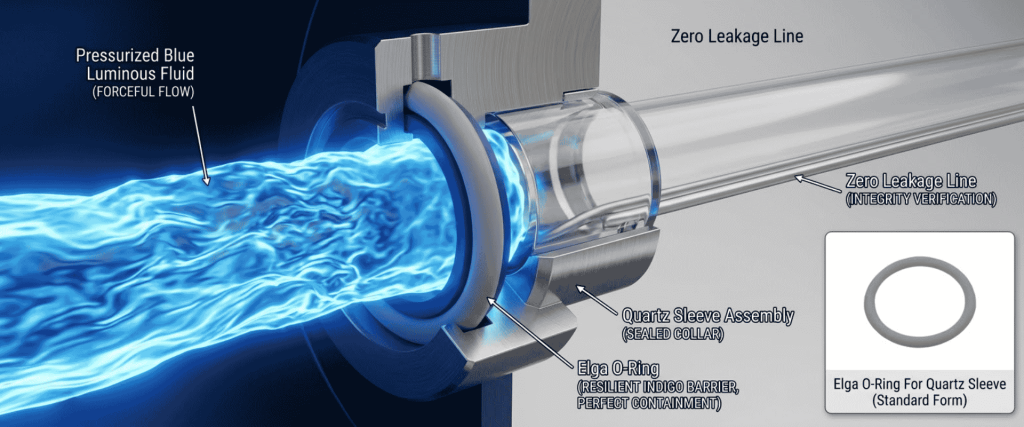
The only barrier preventing catastrophic chamber flooding and shorted ballasts is the dual compression seal seated on the quartz sleeve.
Over thousands of operating hours, intense 185/254 nm radiation and heat degrade these elastomeric O-rings, leading to hairline leaks and sudden TOC spikes.
Applying the correct inspection and replacement protocols protects delicate quartz glassware, keeps downstream water pure, and prevents costly laboratory downtime.
The Role of the Quartz Sleeve Seal
The UV chamber separates the wet process flow from the dry electrical components by seating the UV lamp inside an optical-grade quartz sleeve.
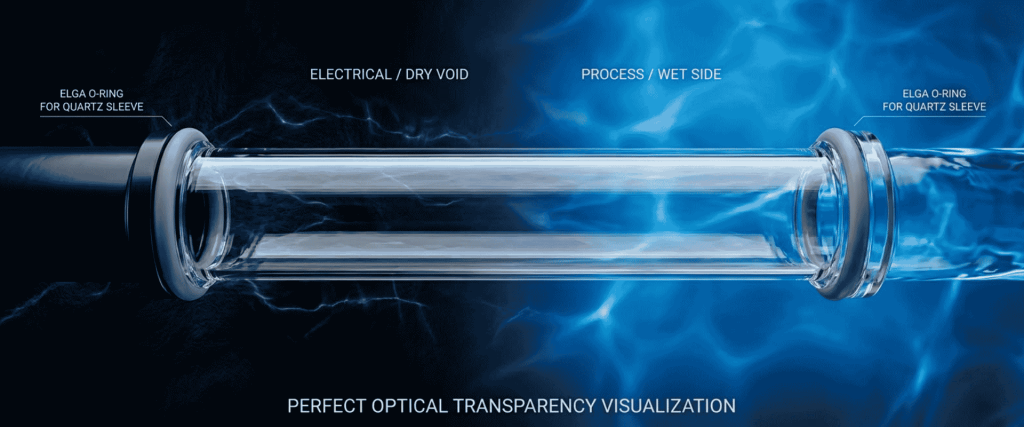
Quartz is chosen because it allows deep UV radiation (especially the fragile 185 nm photolysis line) to penetrate into the water with minimal attenuation.
To isolate the water stream under system operating pressure (typically 1.5 to 4 bar), the assembly relies on a dual-seal geometry:
- Top/Inlet Seal: Clamps the upper lip of the quartz tube against the housing collar.
- Bottom/Outlet Seal: Anchors the closed or pass-through lower end against the base collar.
Both ends must be sealed with matched O-rings. If either seal loses elasticity or shifts off-center, water bypasses the collar, tracks along the outer sleeve wall, and enters the dry enclosure.
Step-by-Step Protocol: Replacing Quartz Sleeve O-Rings Safely
Following a consistent procedure eliminates the two biggest risks during chamber maintenance: cracking the quartz sleeve and introducing contaminants into the water stream.
Step 1: System Isolation and Depressurization
- Turn off the electrical power supply to the ELGA unit and isolate the main electrical switch.
- Close the water supply valve upstream of the UV chamber.
- Open a downstream dispense valve to relieve internal line pressure, then close it once water flow stops.
- Allow the system to rest for 15 minutes so the UV lamp and housing can cool down.
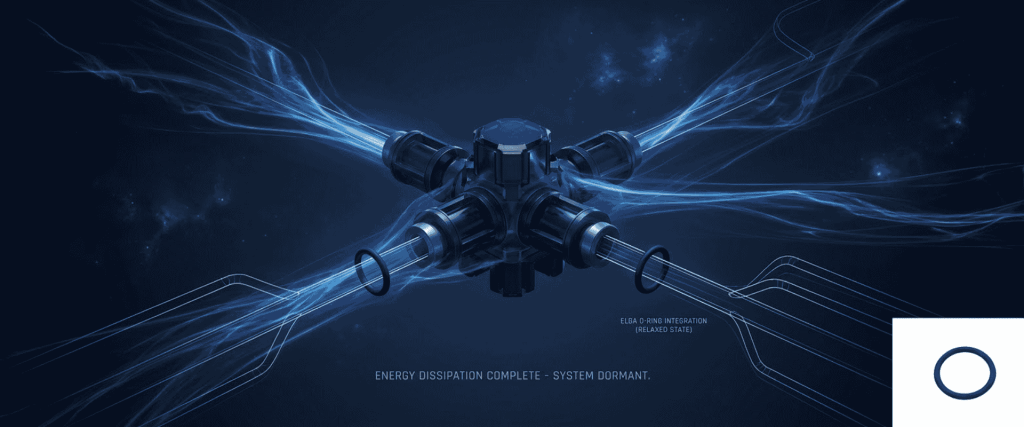
Step 2: Lamp Removal and Disassembly
- Disconnect the electrical wiring connector from the UV lamp base.
- Slide the UV lamp straight out of the center of the quartz sleeve. Place it on a clean, soft surface (avoid touching the glass directly with bare skin, as oils leave hot spots).
- Unscrew the knurled compression nuts or retainers on both ends of the chamber by hand. Do not use pipe wrenches or pliers.
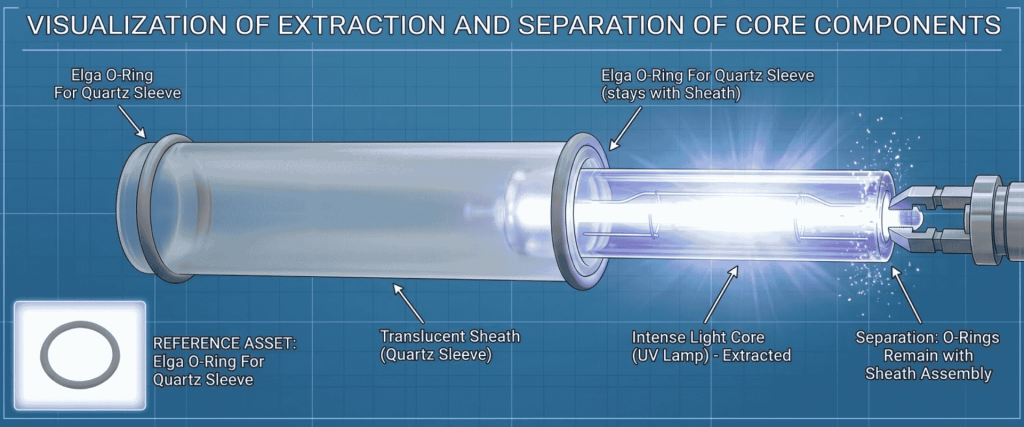
Step 3: Quartz Sleeve Inspection and Seal Extraction
- Gently slide the quartz sleeve out of the chamber. If the O-ring is stuck, apply warm Type 2 water around the collar to soften the bond. Do not pry the glass with metallic tools.
- Roll the old O-rings off both ends of the sleeve and discard them.
- Clean the quartz sleeve using laboratory wipes soaked in pure isopropanol (IPA) to eliminate mineral scaling and film buildup, followed by a final rinse with Type 1 ultrapure water. Let it air-dry.
- Inspect the glass rims for chips or hairline cracks. If any damage is visible, replace the entire sleeve.
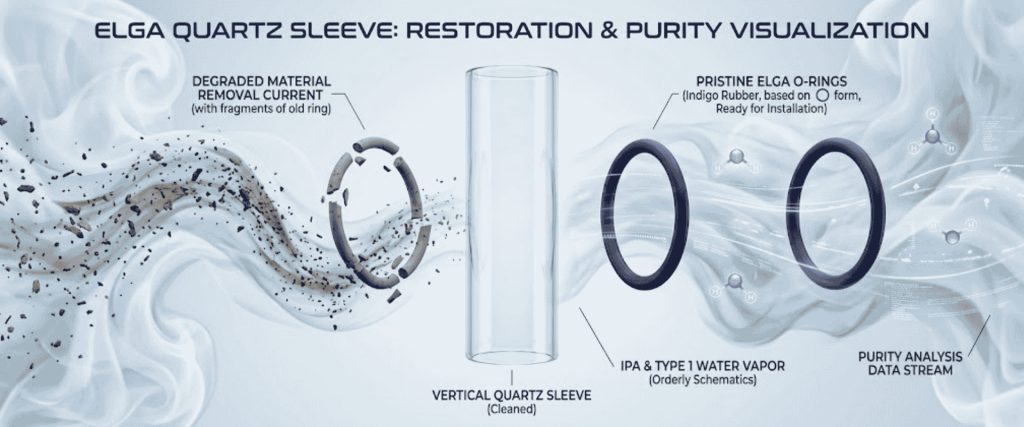
Step 4: Installing the New O-Rings
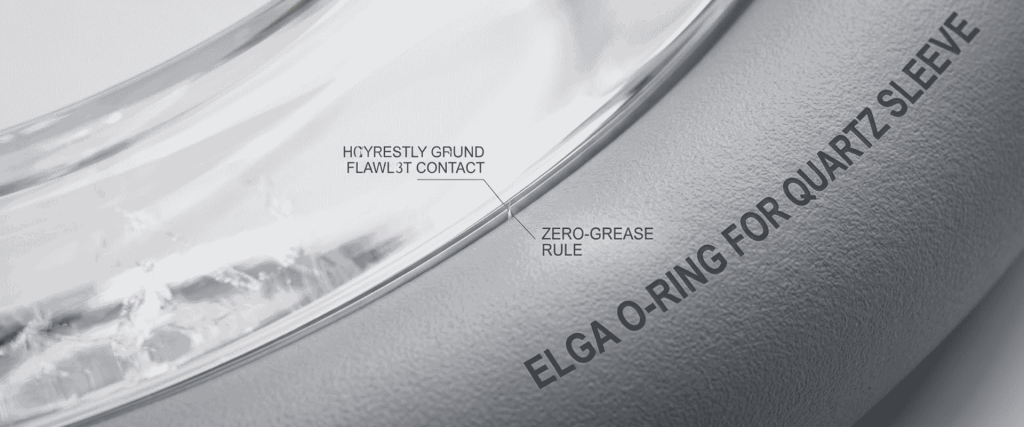
- Take two fresh ELGA O-Rings (Part
Ring11936). - The Zero-Grease Rule: Never use petroleum jelly, hydrocarbon greases, or silicone vacuum lubricants. In an analytical pure-water loop (18.2 MΩ·cm), grease will wash into the system, foul downstream ultrafilters, and trigger severe TOC spikes.
- If lubrication is needed to ease installation, wet the O-rings exclusively with fresh Type 1 ultrapure water.
- Slide one O-ring onto each end of the quartz sleeve, positioning them approximately 5 to 10 mm from the sleeve ends so they align with the chamber sealing shoulders.
Step 5: Reassembly and Controlled Seating
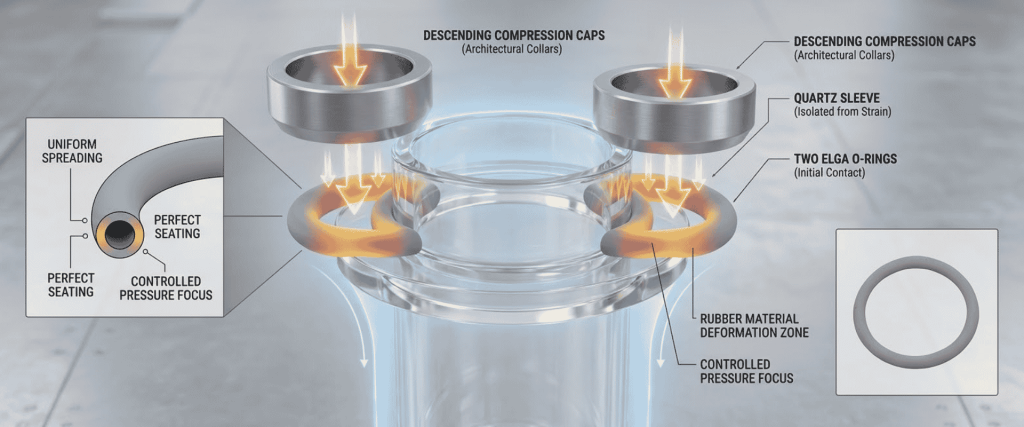
- Slide the sleeve back into the chamber body, ensuring it centers evenly between both ends.
- Thread the compression caps back on by hand. Tighten them hand-tight plus an additional 1/4 turn. The seal should be compressed by uniform elastomeric pressure, not excessive mechanical force.
- Re-install the UV lamp, plug in the wiring harness, and close the protective cover.
Step 6: Hydrostatic Pressure Check
- Open the water feed valve slowly to bring the system up to operating pressure while the unit remains powered off.
- Inspect both collar ends with a dry lint-free wipe for 3 to 5 minutes to confirm there are no weep leaks.
- Once verified, power on the system and confirm proper UV ballast operation and flow stability.
Root Causes of UV Chamber Leaks
A leaking ELGA UV chamber is rarely caused by a defective metal housing. In almost every case, leaks trace back to physical degradation of the elastomeric O-ring or mistakes made during service.
1) Photochemical Embrittlement and Ozone Attack
Standard elastomers fail rapidly inside a UV reactor. The combination of intense 254 nm germicidal flux, 185 nm vacuum-UV radiation, and dissolved ozone ($O_3$) generated in the chamber attacks polymer chains:
- Chain Scission & Cross-Linking: The elastomer loses flexibility, hardens, and develops microscopic surface cracks.
- Compression Set: The O-ring takes on a permanent flat deformation, losing its rebound force against the chamber wall.
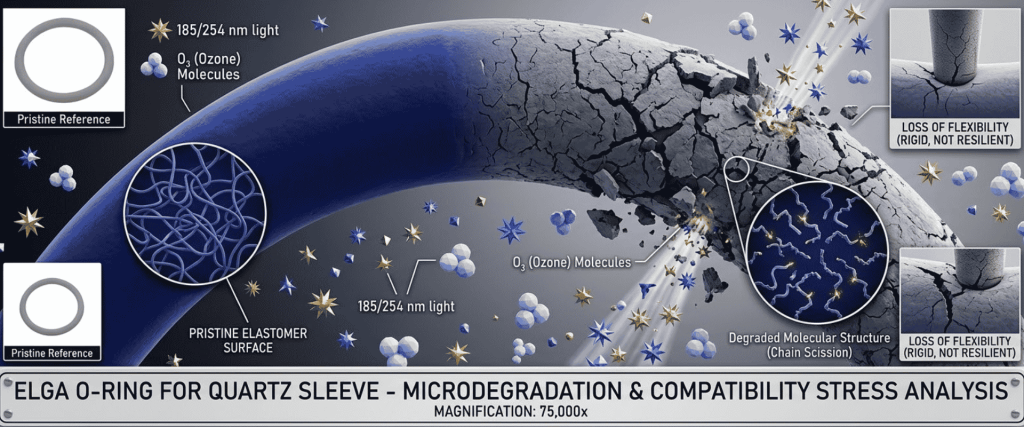
Once elasticity is lost, even small variations in line pressure or thermal cycling will open small leak channels around the quartz boundary.
2) Thermal Adhesion (Baking to Quartz)
UV lamps operate with surface temperatures between 40°C and 80°C. Over an 8,000-to-10,000-hour service cycle, this continuous heat bakes the rubber seal directly onto the quartz glass surface.
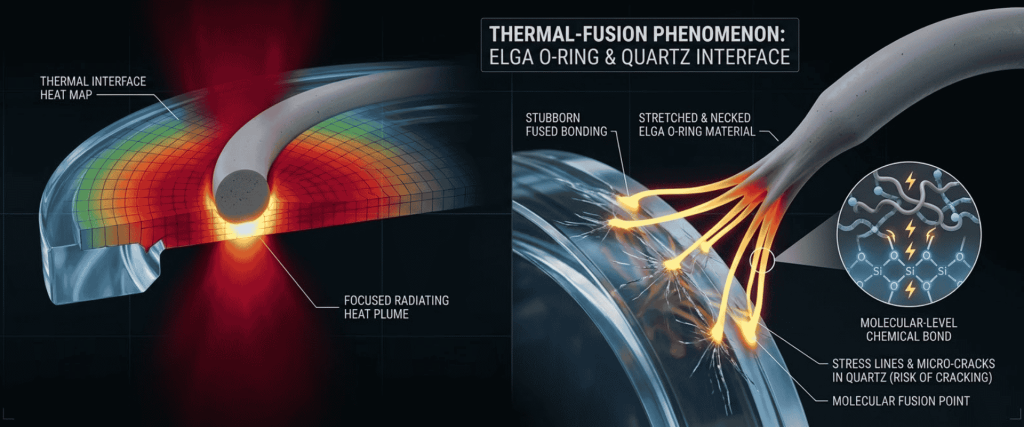
When technicians pull the quartz sleeve for routine inspection, the hardened rubber sticks to the sleeve. Tugging or prying at a stuck seal applies uneven point loads to the thin glass, frequently cracking or shattering the fragile quartz tube.
3) Mechanical Over-Torquing
When a technician spots water dripping from the chamber collar, the natural reaction is often to grab a wrench and tighten the compression cap. With quartz assemblies, this almost always backfires:
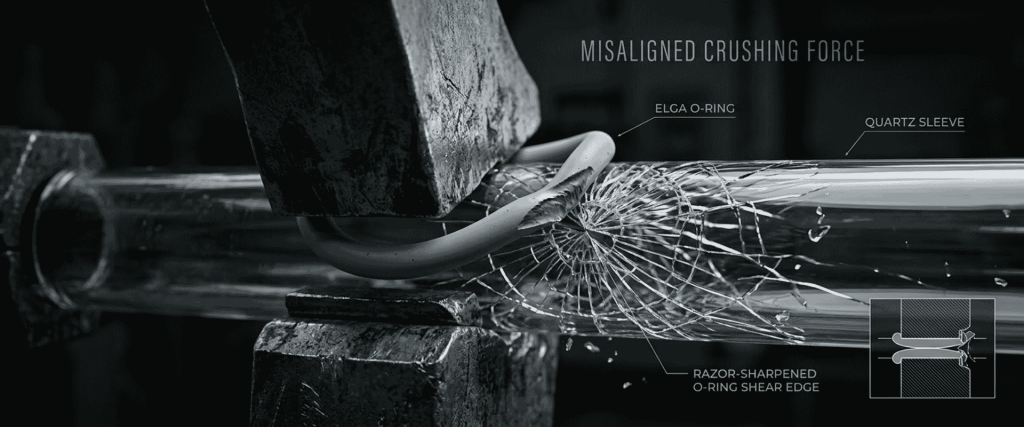
- Quartz possesses high compressive strength along its axis, but very low tensile and shear strength.
- Over-torquing the end-cap pinches the brittle rubber against the rim of the sleeve, causing the glass lip to shear off or micro-crack.
- Once cracked, the sleeve fails completely under normal line pressure, flooding the lamp cavity instantly.
4) Seal Reuse During Annual Lamp Replacements
UV lamps lose photo-oxidation output after 12 months of runtime and must be swapped. Technicians frequently replace the lamp while leaving the old O-rings in place to save time.
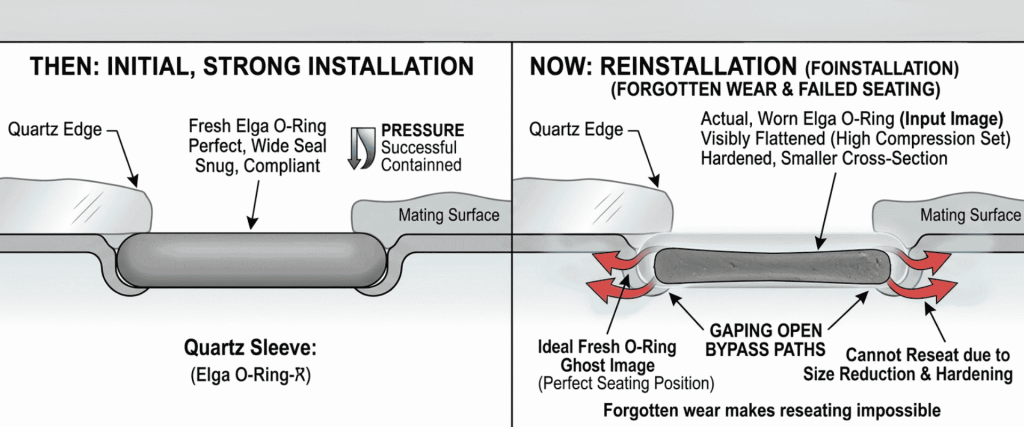
A compressed, hardened seal will not reseat properly once the mechanical compression on the end-cap has been released. Re-pressurizing a reused O-ring is one of the most common causes of immediate leaks following routine service.
Technical Comparison: Seal Integrity Across Service Lifespans
| Performance Factor | Fresh Replacement O-Ring (Ring11936) | Aged O-Ring (12–18 Months In-Service) | Worn / Reused O-Ring |
| Material Elasticity | Resilient; high elastic memory | Low; high compression set | Brittle, flattened profile |
| Surface Hardness | 70–75 Shore A | 85+ Shore A (surface glazed) | Hardened; microscopic cracks |
| Sealing Mechanism | Continuous radial and axial contact | Relies on high clamp force | Incomplete; open bypass paths |
| Risk of Sleeve Breakage | None; slides smoothly during service | High; bonded to quartz wall | Extreme; requires force to detach |
| Impact on Water Purity | Zero chemical or organic shedding | Low-to-moderate surface erosion | Organic fragment/plasticizer release |
| Recommended Action | Install dry or water-lubricated | Replace immediately alongside lamp | Discard immediately; do not reuse |
Impact of Seal Quality on 18.2 MΩ·cm Water and TOC Levels
The performance of an ultrapure water loop depends on chemical inertness. A poorly formulated aftermarket seal poses two distinct threats:
Total Organic Carbon (TOC) Leaching
Substandard elastomers exposed to 185 nm radiation break down quickly, releasing plasticizers, sulfur compounds, and curing agents into the effluent water. This leads to unexplained TOC spikes that ruin sensitive LC-MS, HPLC, and trace analytical baselines.
Particulate Shedding
Flaking material from degrading seals travels downstream, prematurely clogging final point-of-use (POU) 0.22 µm membrane filters and sterile polishers.
Using factory-dimensioned seals manufactured from UV-stable fluoroelastomer compounds ensures clean chemical compatibility with high-purity water, maintaining baseline TOC levels below 5 ppb.
Conclusion
Preventing UV chamber leaks in ELGA water systems comes down to routine maintenance and careful mechanical handling.
Because the quartz sleeve isolates high-voltage electrical components from pressurized water, a degraded O-ring puts more than your water purity at risk; it threatens critical system electronics.
Make it standard laboratory practice to replace both quartz sleeve O-rings (Part Ring11936) during every annual UV lamp service, never reuse old seals, seat the rings without hydrocarbon lubricants, and tighten compression caps by hand.
This disciplined approach protects expensive quartz glassware, prevents water damage to internal ballasts, and keeps your pure water supply steady and compliant.
Frequently Asked Questions (FAQs)
1. How often should ELGA quartz sleeve O-rings be replaced?
They should be replaced every 12 months, ideally during the scheduled annual replacement of the UV lamp (approximately every 8,000 to 10,000 hours of runtime). Never reuse an O-ring after the chamber compression cap has been opened.
2. Can silicone or vacuum grease be used to help seal the O-ring?
No. Greases, oils, and vacuum lubricants should never be used in Type 1 or Type 2 water systems. Hydrocarbon and silicone films wash directly into the pure water stream, fouling polishing cartridges and causing major TOC spikes. Wet the seal with Type 1 water if lubrication is needed.
3. Why does the ELGA quartz sleeve require two O-rings?
The quartz sleeve uses a dual-end mechanical seal to isolate the internal lamp bore while allowing water to flow evenly across its outer surface. One O-ring seals the inlet collar, and the second seals the outlet collar. Both must be replaced together to maintain balanced sealing pressure.
