Precise particle counter calibration depends on clean sample delivery, yet microbubbles remain the leading cause of false counts and failed validations.
Because optical sensors treat air bubbles as solid spheres, entrained air inflates concentration readings and distorts size measurements.
This guide breaks down why air pockets form in Count-Cal™ size standards and outlines step-by-step laboratory protocols to eliminate them.
Follow these practical temperature, mixing, and purging techniques to clear air interference and ensure dependable calibration results.
Following a standardized sample preparation procedure eliminates entrained air before the liquid reaches the optical sensor.
Remove the Count-Cal bottle from refrigerated storage and let it reach room temperature (20°C to 25°C) before sampling. Equilibrating the liquid temperature prevents thermal outgassing inside the optical flow cell.

Mix the suspension by gently inverting the bottle end-over-end 10 to 15 times over 30 seconds. Avoid shaking or vortexing, which creates air foam in the carrier fluid.

If microbubbles remain visible, place the sealed Count-Cal bottle in a laboratory ultrasonic bath for 10 to 30 seconds. Do not exceed 30 seconds; excessive sonication warms the liquid and can cause particle agglomeration.
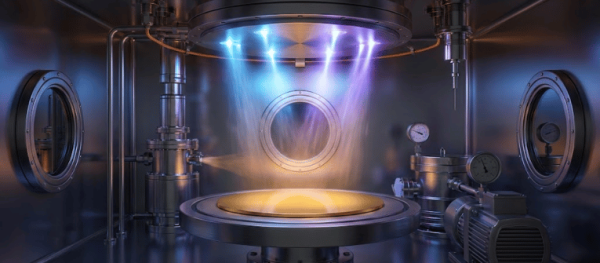
![Particle Counter Calibration] Calibration bottle inside glass chamber with blue particles and glowing spheres, scientific lab display](https://appliedphysicsusa.com/wp-content/uploads/2021/11/Particle-Counter-Calibration-Calibration-bottle-inside-glass-chamber-with-blue-particles-and-glowing-spheres-scientific-lab-display-1024x427.png)
Inspect all sample lines, fitting rings, and syringe connections for airtight seals. Set the particle counter’s sample draw speed to a moderate rate to minimize internal vacuum pressure.

Flush the fluidics with 2 to 3 cycles of clean, degassed ultra-pure water (DI water), followed by a 1 mL pre-flush of the Count-Cal standard. This clears trapped air pockets from internal valves and tubing walls before recording data.

Identifying where air enters the fluid path allows technicians to address the root causes.
Shaking the Count-Cal bottle introduces microscopic air pockets into the surfactant-stabilized aqueous medium. These bubbles remain suspended for extended periods.

Cold standards taken directly from refrigerated storage (2°C to 8°C) hold high levels of dissolved gas. As the liquid warms within the sample tubing or sensor cell, dissolved gas is released as microbubbles.

Fast sample draw rates create localized low pressure inside syringe pumps or narrow tubing, pulling dissolved gas out of solution.

Unsealed Luer connectors, worn peristaltic pump tubing, or loose intake lines pull room air directly into the sample flow.

Liquid particle counters measure contamination by passing a fluid sample through an optical cell illuminated by a laser diode. As a particle passes through the beam, it blocks or scatters light.
The photodetector measures the change in light intensity and converts the pulse height into an equivalent spherical diameter based on calibration curves.
When microbubbles flow through the optical cell alongside Count-Cal PSL microspheres, the sensor logs each bubble as an additional particle.

This pushes the measured concentration per milliliter beyond the certified tolerance range specified on the product Certificate of Analysis.
Air bubbles vary in size and boundary curvature, scattering light unpredictably. Depending on their diameter, microbubbles generate pulse heights that mimic solid particles across multiple size thresholds.

This shifts particle counts into the wrong size channels (bins), invalidating resolution and linearity checks.
| Diagnostic Parameter | Air Bubble Interference | Genuine Count-Cal PSL Standard |
| Count Consistency | Erratic counts between consecutive runs | Stable counts within ±10% of certified value |
| Size Distribution | Broad dispersion across multiple channels | Sharp, narrow peak at certified diameter |
| Settling Behavior | Count drops significantly after resting 10–15 min | Count remains stable after gentle inversion |
| Effect of Flow Rate | Counts spike at higher syringe draw speeds | Counts remain stable across normal flow rates |
| Signal Pulse Shape | Irregular light scattering intensity | Uniform pulse height matching sphere size |
Proper handling preserves the concentration accuracy and shelf life of Count-Cal standards.
Eliminating air bubble interference is critical for valid liquid particle counter calibration.
Replacing bottle shaking with gentle inversion, allowing cold standards to equilibrate to room temperature, and securing fluidic connections prevents false counts and maintains calibration accuracy.
Adopting these techniques ensures reliable instrument performance compliant with USP, ISO, and cleanroom quality standards.
Run three consecutive samples without re-mixing the bottle. If particle counts drop significantly from the first to the third run, air bubbles are rising out of suspension. If counts stay consistent, the reading reflects actual particles.
Yes, but limit sonication to 10 to 30 seconds in a low-power bath. Extended sonication generates heat, which causes additional outgassing and can destabilize the particle suspension.
Vigorous shaking mixes air into the surfactant-stabilized liquid, forming microbubbles that light obscuration sensors mistake for solid particles.
Perform calibrations at room temperature (20°C to 25°C). Cold liquids carry more dissolved gas, which forms microbubbles when drawn into warmer instrument sensors.

Enter your details below to save your shopping cart for later. And, who knows, maybe we will even send you a sweet discount code :)
Allow notifications to get real-time updates about your shopping cart and who knows, you may even receive a sweet discount code 😊